背景
お仕事でつかうから!
前提
AWSを契約している。
npmをインストールしている。
手順
Amplifyをインストールする。
npm install -g @aws-amplify/cliプロジェクトからAWSリソースを操作するIAMユーザを作成・設定を行います。コマンドを実行するとブラウザが起動しAWS画面が表示するのでブラウザ操作を5つほどこなしてください。
“? region:”では、利用するAWSのリージョンを選択してください。
“? user name:”では、プロジェクト名を入力してください。
“? accessKeyId:”では、最後のブラウザ操作で表示されたアクセスキーを入力してください。
“? secretAccessKey:”では、同じくブラウザ操作で表示されたシークレットアクセスキーを入力してください。
“? Profile Name:”では、プロファイル名を入力してください。
>amplify configure
Follow these steps to set up access to your AWS account:

Sign in to your AWS administrator account:
https://console.aws.amazon.com/
Press Enter to continue

Specify the AWS Region
? region:  ap-northeast-1
Specify the username of the new IAM user:
? user name:  Sample
Complete the user creation using the AWS console
https://console.aws.amazon.com/iam/home?region=ap-northeast-1#/users$new?step=final&accessKey&userNames=Sample&permissionType=policies&policies=arn:aws:iam::aws:policy%2FAdministratorAccess-Amplify
Press Enter to continue

Enter the access key of the newly created user:
? accessKeyId:  ********************
? secretAccessKey:  ****************************************
This would update/create the AWS Profile in your local machine
? Profile Name:  Sample

Successfully set up the new user.
最初のブラウザ操作で作成するIAMユーザ名と認証タイプをチェックします。AWSのコマンドやプロジェクトで利用する分ではパスワードは不要なため以下の画面ではいれてません。

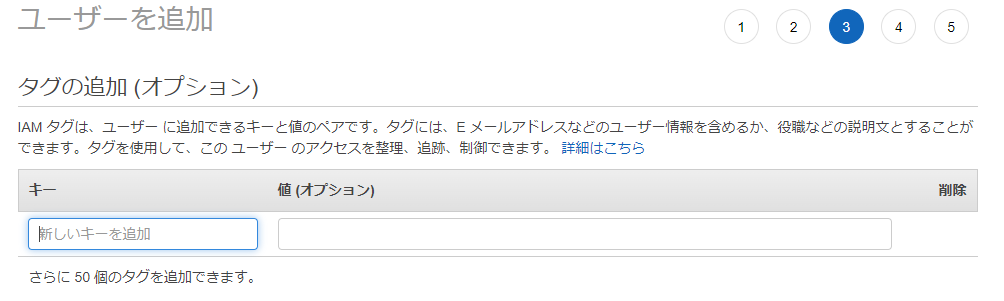
作成するIAMユーザのポリシーを設定します。たくさんあるので詳細は分かっていません。

以下は詳細がよくわかっていません。どんなことに利用することを想定しているのでしょうか?
作成するIAMユーザの情報を確認します。

ユーザが作成されました。ブラウザ操作 1でアクセスキーをチェックしたためキーが2つ出力されています。これは実行中のコマンドで入力する必要があります。ここでしか表示されませんのでブラウザを閉じてしまった場合IAMユーザの管理画面でアクセスキーを追加作成する必要が出てきます。

そのままコマンドプロンプトで実行すると以下のようになる。
>amplify init
Note: It is recommended to run this command from the root of your app directory
? Enter a name for the project Sample
The following configuration will be applied:

Project information
| Name: Sample
| Environment: dev
| Default editor: Visual Studio Code
| App type: javascript
| Javascript framework: none
| Source Directory Path: src
| Distribution Directory Path: dist
| Build Command: npm.cmd run-script build
| Start Command: npm.cmd run-script start

? Initialize the project with the above configuration? Yes
Using default provider  awscloudformation
? Select the authentication method you want to use: AWS profile

For more information on AWS Profiles, see:
https://docs.aws.amazon.com/cli/latest/userguide/cli-configure-profiles.html

? Please choose the profile you want to use Sample
Adding backend environment dev to AWS Amplify app: d4ob9pfrpn6et
| Initializing project in the cloud...

CREATE_IN_PROGRESS amplify-sample-dev-231804 AWS::CloudFormation::Stack Wed Jul 27 2022 23:18:06 GMT+0900 (GMT+09:00) User Initiated
CREATE_IN_PROGRESS UnauthRole                AWS::IAM::Role             Wed Jul 27 2022 23:18:09 GMT+0900 (GMT+09:00)
CREATE_IN_PROGRESS AuthRole                  AWS::IAM::Role             Wed Jul 27 2022 23:18:10 GMT+0900 (GMT+09:00)
CREATE_IN_PROGRESS DeploymentBucket          AWS::S3::Bucket            Wed Jul 27 2022 23:18:10 GMT+0900 (GMT+09:00)
\ Initializing project in the cloud...

CREATE_IN_PROGRESS AuthRole         AWS::IAM::Role  Wed Jul 27 2022 23:18:11 GMT+0900 (GMT+09:00) Resource creation Initiated
CREATE_IN_PROGRESS UnauthRole       AWS::IAM::Role  Wed Jul 27 2022 23:18:11 GMT+0900 (GMT+09:00) Resource creation Initiated
CREATE_IN_PROGRESS DeploymentBucket AWS::S3::Bucket Wed Jul 27 2022 23:18:12 GMT+0900 (GMT+09:00) Resource creation Initiated
\ Initializing project in the cloud...

CREATE_COMPLETE DeploymentBucket AWS::S3::Bucket Wed Jul 27 2022 23:18:34 GMT+0900 (GMT+09:00)
\ Initializing project in the cloud...

CREATE_COMPLETE UnauthRole                AWS::IAM::Role             Wed Jul 27 2022 23:18:52 GMT+0900 (GMT+09:00)
CREATE_COMPLETE AuthRole                  AWS::IAM::Role             Wed Jul 27 2022 23:18:52 GMT+0900 (GMT+09:00)
CREATE_COMPLETE amplify-sample-dev-231804 AWS::CloudFormation::Stack Wed Jul 27 2022 23:18:55 GMT+0900 (GMT+09:00)
✓ Successfully created initial AWS cloud resources for deployments.
✓ Help improve Amplify CLI by sharing non sensitive configurations on failures (y/N) · yes
✓ Initialized provider successfully.
✓ Initialized your environment successfully.

Your project has been successfully initialized and connected to the cloud!

Some next steps:
"amplify status" will show you what you've added already and if it's locally configured or deployed
"amplify add <category>" will allow you to add features like user login or a backend API
"amplify push" will build all your local backend resources and provision it in the cloud
"amplify console" to open the Amplify Console and view your project status
"amplify publish" will build all your local backend and frontend resources (if you have hosting category added) and provision it in the cloud

Pro tip:
Try "amplify add api" to create a backend API and then "amplify push" to deploy everything
? Enter a name for the project
プロジェクト名を入力してください。
? Initialize the project with the above configuration?
“Project information”で出力されている情報を確認し変更の必要がなければ”Y”を入力してください。
? Select the authentication method you want to use:
正確にはよくわかっていません。認証方法としてプロファイルを利用するかアクセスキーを利用するか。今回は参考資料がプロファイルを選択していたのでそっちを利用。恐らくプロファイルではローカルにアクセスキーなどが保存され、覚える・控える必要がないのではなかろうか?
? Please choose the profile you want to use
プロファイルを選択したのでプロファイル名を入力します。正確には不明ですが、先のコマンドで入力したプロファイル名を入力します。
注意事項
“amplify init”を実行したときに以下のようなエラーが発生した人はいますか?
> amplify init
amplify : このシステムではスクリプトの実行が無効になっているため、ファイル C:\Users\ユーザ\AppData\Roaming\npm\amplify.ps1 を読み込むことができません。詳細については、「about_Execution_Policies」(https://go.microsoft.com/fwlink/?L
inkID=135170) を参照してください。
発生場所 行:1 文字:1
+ amplify init
+ ~~~~~~~
    + CategoryInfo          : セキュリティ エラー: (: ) []、PSSecurityException
    + FullyQualifiedErrorId : UnauthorizedAccess
そんな人はPowerShellで以下を順に実行すると意図した処理が始まります。
> Get-ExecutionPolicy
> Set-ExecutionPolicy -ExecutionPolicy RemoteSigned -Scope Process
> Get-ExecutionPolicy
> amplify init
Note: It is recommended to run this command from the root of your app directory
? Enter a name for the project プロジェクト名
The following configuration will be applied:

Project information
| Name: プロジェクト名
| Environment: dev
| Default editor: Visual Studio Code
| App type: javascript
| Javascript framework: vue
| Source Directory Path: src
| Distribution Directory Path: dist
| Build Command: npm.cmd run-script build
| Start Command: npm.cmd run-script serve

? Initialize the project with the above configuration? Yes
Using default provider  awscloudformation
? Select the authentication method you want to use: AWS profile

For more information on AWS Profiles, see:
https://docs.aws.amazon.com/cli/latest/userguide/cli-configure-profiles.html

? Please choose the profile you want to use プロジェクト名

-- 割愛
✓ Successfully created initial AWS cloud resources for deployments.
✓ Help improve Amplify CLI by sharing non sensitive configurations on failures (y/N) · yes
✓ Initialized provider successfully.
✓ Initialized your environment successfully.

Your project has been successfully initialized and connected to the cloud!

Some next steps:
"amplify status" will show you what you've added already and if it's locally configured or deployed
"amplify add <category>" will allow you to add features like user login or a backend API
"amplify push" will build all your local backend resources and provision it in the cloud
"amplify console" to open the Amplify Console and view your project status
"amplify publish" will build all your local backend and frontend resources (if you have hosting category added) and provision it in the cloud

Pro tip:
Try "amplify add api" to create a backend API and then "amplify push" to deploy everything

>
ピンバック: AmplifyでAWS Cognitoするプロジェクトを作成する準備 – E-Lab / Engineer Laboratory